![[Go to /]](/DutchGrid-logo-CA.gif)
DCA Root Service
DCA Root CA G1
Trusted Certificate Service TCS
Request your certificate with Academic Login
Guide and tools
Production CA (MS)
Overview
Manage Your Certificates
(for non-TCS users)
Find a local registrar
Classic interface
Help with your request
Host certificate requests
Submit your request
Download your certificate
Renew your certificate
Request revocation
Reliance information
Policy Statement
Reliance Information
NL e-Infra Zero
(training services)
Documentation
Legacy Cert Request Guide
Change a passphrase
RA OpsGuide
OpenSSL for Windows
eToken Guide
Links
EUGridPMA
IGTF
Privacy Policy
Browser Import Walkthrough
Contents:- Command-line steps: convert to PKCS#12
- Firefox and Netscape browsers
- Internet Explorer
General Steps
| First, go to the directory that contains your matching pair of usercert.pem and userkey.pem files. The key file has been generated by the makerequest script before your application; the cert file is your certificate, which got mailed to you afterwards, and which you can retrieve from the web pages at any time. |
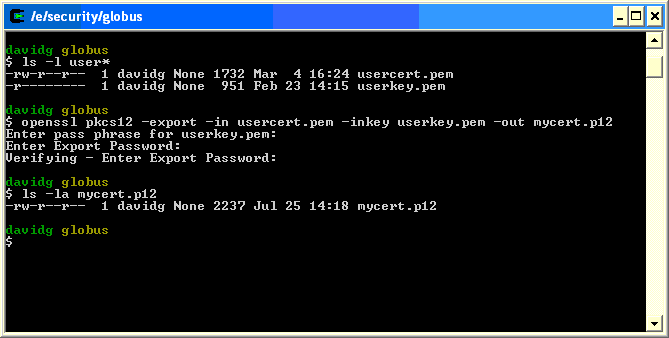
You can convert your Globus cert to a Netscape-readable PKCS#12 structure with the following openssl command:
openssl pkcs12 -export -in usercert.pem -inkey userkey.pem \
followed by
-out your-new-packed-cert.p12
chmod 0600 your-new-packed-cert.p12
as shown below. You will have to type three passphrases:
chmod 0600 your-new-packed-cert.p12
Note that you may have to copy this file to a place where you can
see it from your browser.
|
 |
Firefox and Netscape
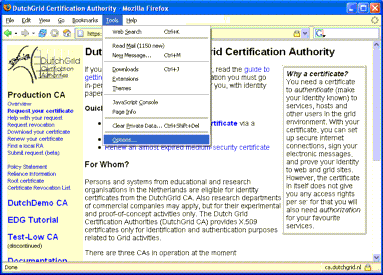
| Open your browser window. If you are using Firefox or other NSS based browsers, go to the "Tools" meny and select "Options". |
 |
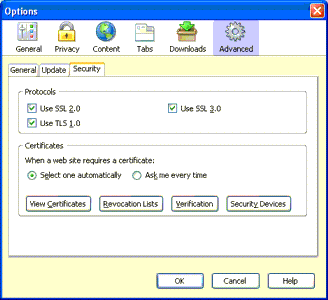
In the Options dialog, select the "Advanced" section and click on the "View Certificates" button in the "Security" tab. Then, click on the "View Certificates" button. |
 |
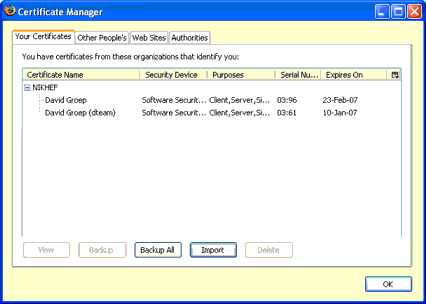
In the Certificate Manager, which now opens in a new window, you can click on the "Import" button to import your key and certificate in PKCS#12 format into your browser. If you use the certificate manager for the first time, you will have to initialise this "software security device" by providing a strong passphrase (twice, to prevent typo's). A quality meter will show you how good the passphrase actually is. Never leave this password empty. |
 |
Internet Explorer
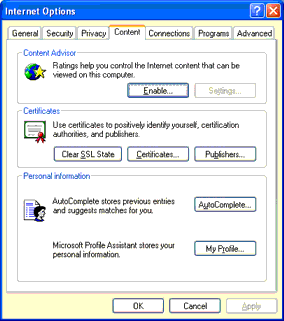
| For MS Internet Explorer 5 and higher, also select "Internet Options" from the "tools" menu. In the Internet Options dialog, go to the "Content" tab and click on the Certificates button. |
 |
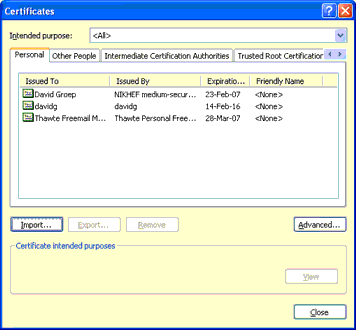
In the Certificates window, click on the Import button to start the certificate import wizard. |
 |
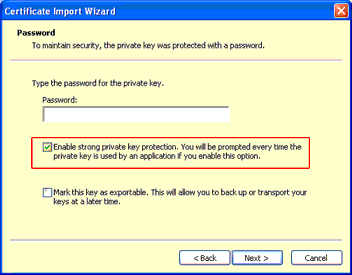
The wizard will ask you for a filename (you need the Personal Information Exchange format, with the pfx or p12 extensions). Select the file and click "Next" to give the decryption passprase for your PKCS#12 file (which you entered in step 2). Important: you must check the "Enable strong private key protection" box, or everyone who happens to sneak behind your PC can use the grid under your name without even having to guess a password. If you leave the box unchecked, you have severely compromised your credential. You may mark the key as exportable. |
 |
The certificate should but put in the "Personal" certificate store, but usually the import wizard will make the correct decision. Just click "Next" to continue, and then "Finish" to complete the process. |